What to Do If You Receive an Offline Alert
This article will help you get your Sensor back online if you receive an offline notification.
Unplugging your Sensor's power cable, waiting 10 seconds and then reconnecting it can often reconnect your Sensor automatically to your Wi-Fi network. If it doesn't, please follow the steps below.
If your Sensor is networked using Wi-Fi
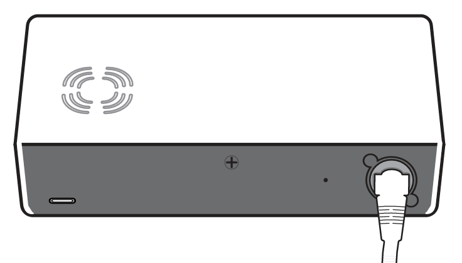
Step 1. Check that your Sensor is powered - this can be checked by looking for LED status lights on the side of the device, like below, ensuring the power cable is securely fitted into the Sensor and at the opposite end.
If using a supplied mains ethernet adapter, please ensure this is also plugged in securely and switched on.

Step 2. If you have just returned power to the device, wait up to a minute to see if it automatically re-connects to your network. Once connected, both the red and green LEDs will be continuously lit.
Step 3. If your Sensor doesn't automatically re-connect, put it in hotspot mode. Please press the reset switch on the back of the unit for 5 seconds, using a pen, until the LEDs change their state and begin flashing in unison.

Step 4. Use a computer, smartphone or tablet to connect to the Wi-Fi access point named “Hoxton Direct hotspot”.
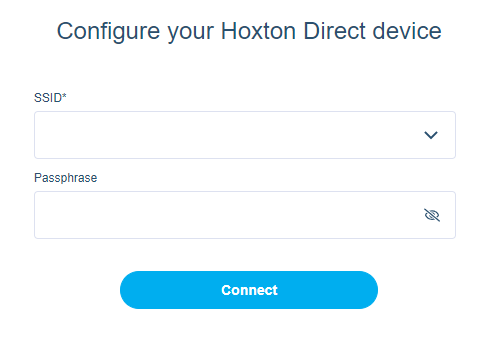
Step 5. After a few moments, the below pop-up should appear. Select the network that you wish for the Sensor to connect to by clicking the box labelled 'SSID'.

Step 7. Enter the Wi-Fi password for this network into the 'Passphrase' box.
Step 8. After clicking the Connect button, your computer, or other device, will be disconnected from the Hoxton Direct hotspot and reconnected to the Wi-Fi network your computer was on before.
Step 9. Wait up to one minute, during which the sensor will indicate a successful Wi-Fi connection with both a solid green and red LED.