How to Connect a Sensor to a Wi-Fi Network
This article will explain how to connect a Sensor to your Wi-Fi network so that it can start counting.
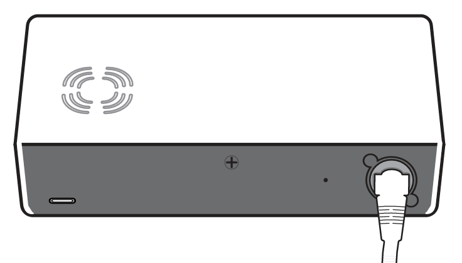
Step 1. Connect the Power Over Ethernet plug to your mains power.
Step 2. Connect one end of the provided ethernet cable to the socket marked “Data and Power Out.”
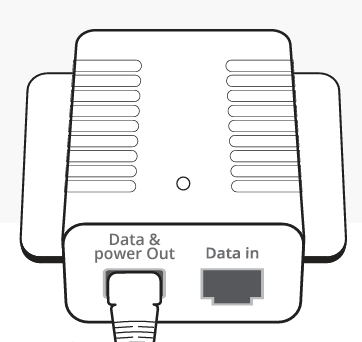
Step 3. Plug the other end of the cable into the Sensor.
Check that the red LED on the side of the sensor is 'On' to confirm power is being delivered.
Step 4. Use a computer, smartphone or tablet to connect to the Wi-Fi access point named “Hoxton Direct hotspot”
Step 5. After a few moments, the below pop-up should appear. Select the network that you wish for the Sensor to connect to by clicking the box labelled 'SSID'.
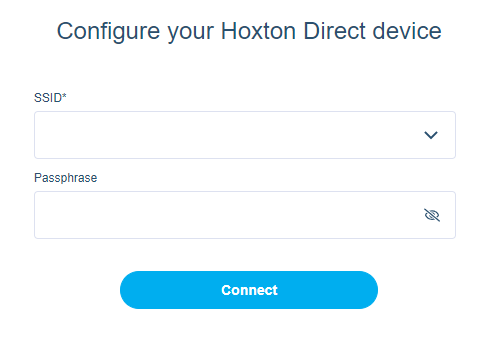
Step 7. Enter the Wi-Fi password for this network into the 'Passphrase' box.
Step 8. After clicking the Connect button, your computer will be disconnected from the Hoxton Direct hotspot and reconnected to the Wi-Fi network your computer was on before.
Step 9. Wait up to one minute, during which the sensor will indicate a successful Wi-Fi connection with both a solid green and red LED.