HoxtonAi Control Room introduction
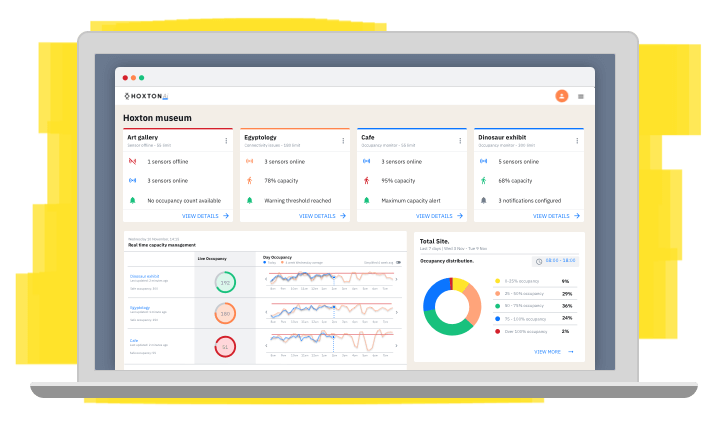
The Control Room is where you can set up and manage your People Count and Occupancy Monitoring solutions.
This guide is aimed at first time users. It will take you through the first steps of:
If you're looking for help connecting a sensor you have received, please see the Sensor setup guide.
For any questions not answered in this guide, please look at the knowledge base. Or if you are still not able to resolve an issue contact our support team suport@hoxtonanalytics.com.
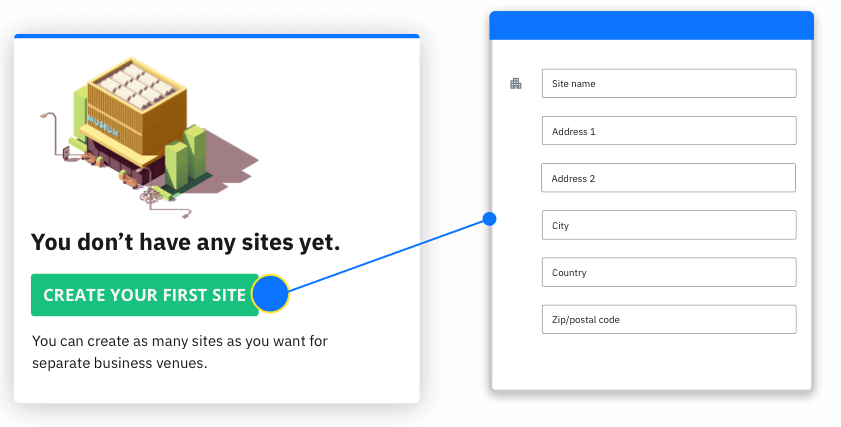
A site is the whole building or address that you want to use HoxtonAi sensors in. You can add as many sites as you need for your organisation.
Setting up a site will be one of the first things you need to do when you get access to your Control Room and the process is very easy.
This short video will explain the process of setting up sites in the Control Room.
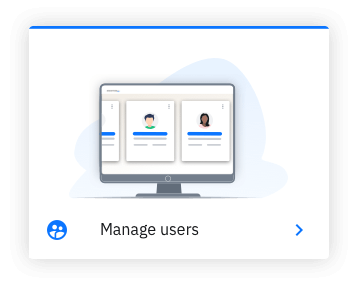
Create an account for anyone in your organisation who will need access to the Control Room.

Users can be given access to all your sites or a restricted selection.
Admin accounts have access to all sites in your organisation and all areas of the Control Room.
Member accounts can be specific to just one site.
Monitors are a new concept to replace spaces. Monitors make it easier to setup and manage your people counting and occupancy solutions.
If you have any questions, we suggest contacting our support team
Monitors are an integral part of setting up your people counting.
You will need a connected sensor to complete a monitor setup - but you can start the process even if you haven't received your sensor(s) yet.
There are two types of monitor.
Gather data points of date, time and directional flow for the people passing through your doorways.
These monitors can be used in a multitude of ways to suit different business needs. Some common use cases are:
Take people counting data to the next level. Occupancy monitors tell you how many people are in your spaces at any time.
Businesses are using this knowledge to increase ticket sales and optimise staff schedules.
This should be descriptive of the space it is monitoring. eg: Shop visitors (if it's counting all traffic through the only door in/out of your shop), or First floor POS (if you were counting people passing a sales promotion spot on the first floor).
Positions are where you are mounting sensors in your monitor.
All data from the sensor is saved to the position it is located at. So if you move or replace a sensor - the data it collected is kept.
A position must be given 2 directions. The name of these should describe the direction a person is travelling in eg: Into main building & Leaving building. Or Towards foyer & Towards gift shop.
After setting up your positions - you will be prompted to connect a sensor. Select from the list of your registered sensors. Find out more about connecting a sensor.
You'll be a shown a camera view from your sensor and asked to confirm the orientation of your given direction names (so we know which way around the camera is pointing).
Your sensor must be online to keep tracking visitor numbers and we recommend setting up alerts to notify team members whenever a sensor goes offline. If you have already set up some sensor alerts, you will be able to select them here. If you haven't set up any sensor alerts yet find out more here.
This short video will walk you through the steps of setting up a HoxtonAi People Count monitor.
This should be descriptive of the space it is monitoring. eg: 'Shop visitors' (if it's counting occupancy of your entire shop). 'Gift shop' (If you are counting a specific space within your site).
Set the maximum (or optimum) capacity you want in the space being monitored. You can configure notifications to be sent to team members based on space usage in relation to this figure. The occupancy count for the monitor will reset to 0 every 24 hours. Set the time of day you would like this to be. This is typically at the end of your day or just before you open.
Positions are where you are mounting sensors in your monitor.
It's important you have a sensor on every entrance/exit into the space being monitored. Your occupancy counts will be innacurate if people can enter/exit the space without a sensor recording it.
If your space has 3 doorways, you should create 3 positions and mount a sensor in each. All data from the sensor is saved to the position it is located at. So if you move or replace a sensor - the data it collected is kept.
A position must be given 2 directions. The name of these should describe the direction a person is travelling in eg: Into main building / Leaving building or Towards foyer / Towards gift shop.
Additionally to labelling the directions for the positions in your monitor - you will need to specify which of these directions leads into the monitor space.
After setting up your positions - you will be prompted to connect a sensor. Select from the list of your registered sensors. Find out more about connecting a sensor.
You'll be a shown a camera view from your sensor and asked to confirm the orientation of your given direction names (so we know which way around the camera is pointing).
Your sensor must be online to keep tracking visitor numbers and we recommend setting up alerts to notify team members whenever a sensor goes offline.
If you have already set up sensor alerts, you will be able to select them here. If you haven't find out more here.
This short video will walk you through the process of setting up a HoxtonAi Occupancy Monitor.
For all HoxtonAi solutions it's essential your sensors remain connected to the internet to be able to keep counting your traffic.
We recommend you set up alerts to notify team members whenever sensors go offline or experience periods of poor connectivity. This ensures you can get the back online as quickly as possible and experience the minimum interruption to your traffic data.
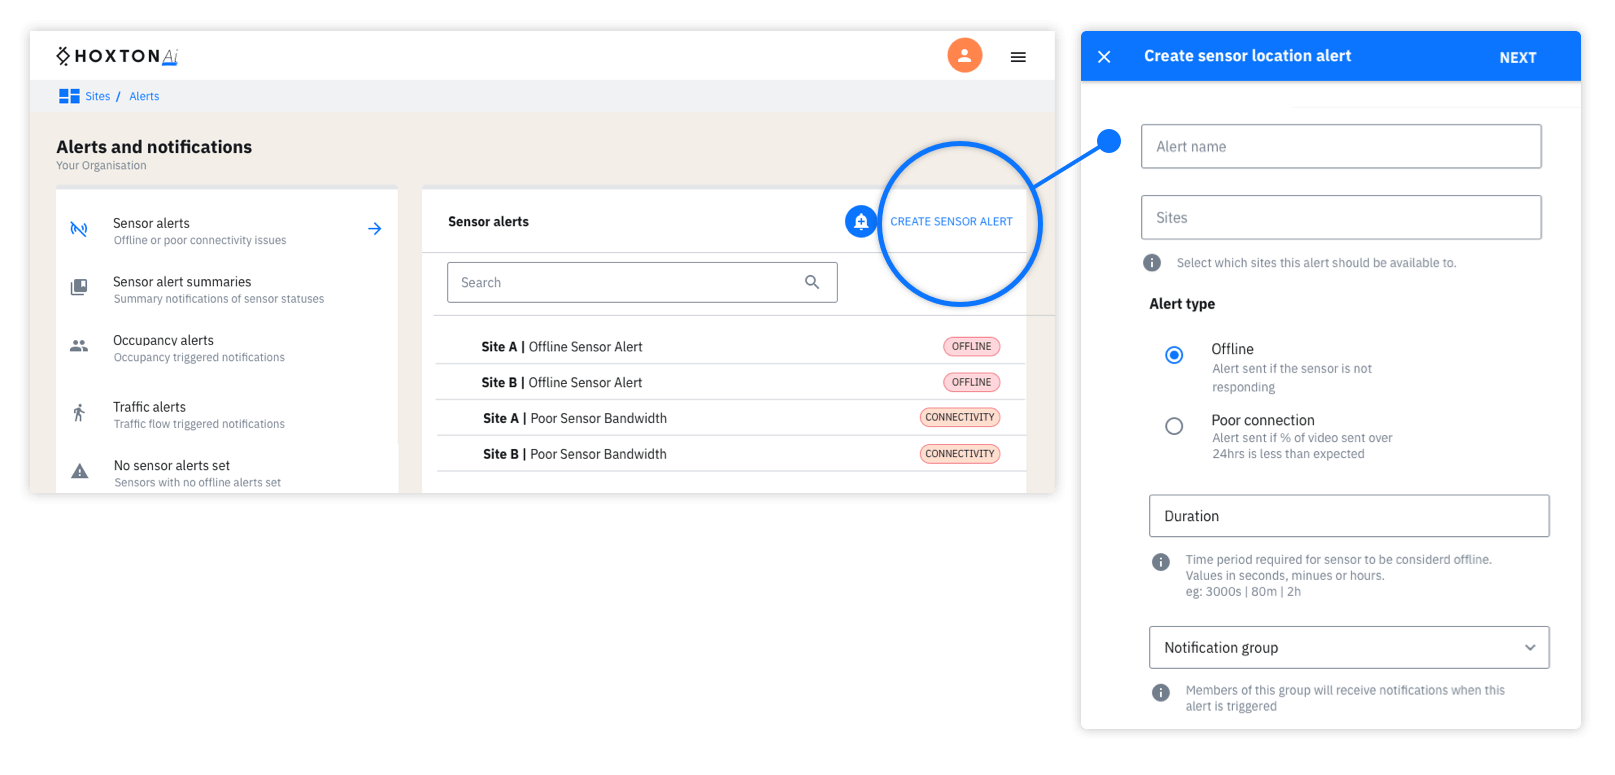
Set up alerts for sensors that are offline or have poor connectivity.
Creating sensor alerts.
Occupancy alerts will notify you when certain occupancy thresholds are reached.
Give your alert a name, and choose the sites that this will apply to (if you have staff who work across multiple sites, you might find it easier to set up a single rule to cover all of them).
Your alert threshold is the level of capacity that can be reached before an alert is sent. If the capacity is 100 and you set the threshold to 90%, you will get notified when the capacity reaches 90 people.
Some teams might also want to receive alerts when occupancy numbers hit a lower ‘warning’ threshold. If you want to use this feature, active it and then set the threshold level in the same way you did for the alert threshold. In this case we’re doing to set it to 75%. Which means we’ll get an alert when occupancy reaches 75 people. If the occupancy number continues to rise, you would also receive an alert notification when occupancy reached 90.
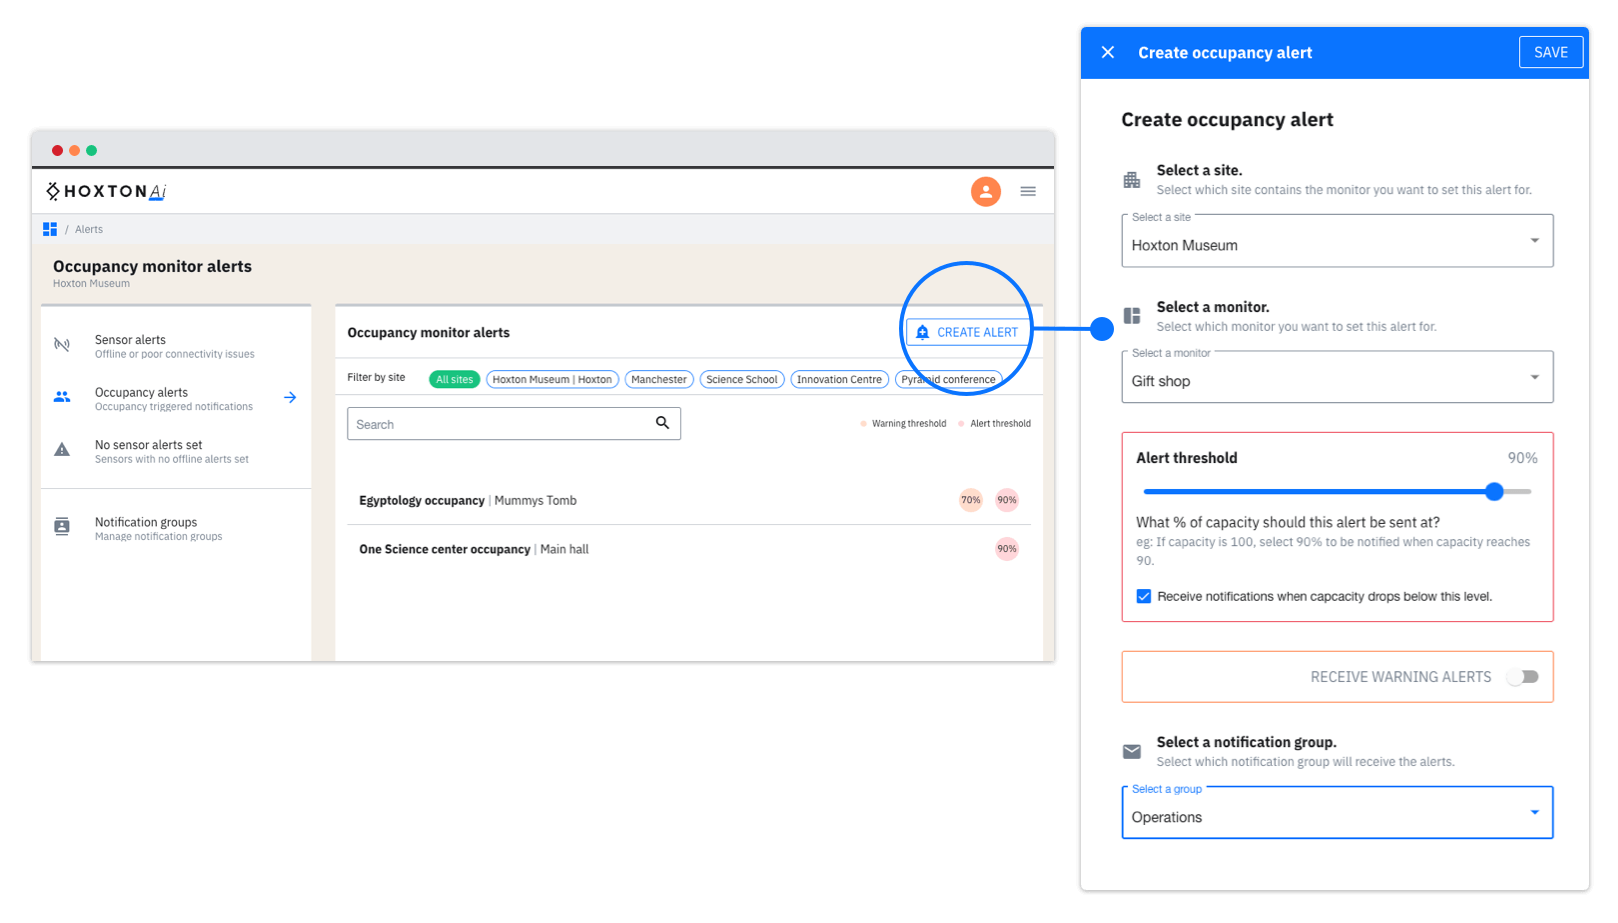
Set up occupancy alerts to be notified when monitored areas are near or at capacity.
This short video will explain the process of creating an occupany alert.
Notification groups make it easier to ensure the right people in your organisation are being notified about sensor statuses and visitor traffic.
Ensure you are already familiar with the process of adding a new user.
Notification groups are can be managed within the Alerts area in the Control Room.
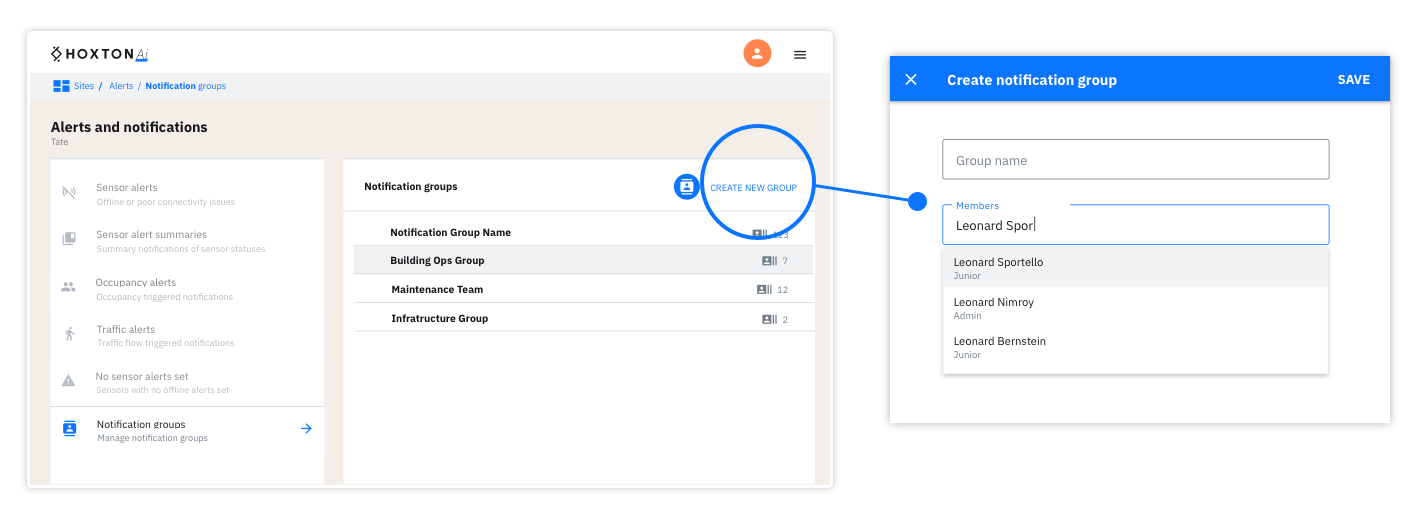
Creating a notififcation group is as easy as giving it a name and adding the email addresses of everyone you want to be part of the group.
You will assign email alerts to be sent to your notification groups when you create new alerts. You can send multiple alerts to any notification group.
This video will walk you through the process of creating a notification group.
You should now have a good overview of the Control Room and how to start monitoring traffic and usage of your spaces.
For more indepth articles about specific features please see the Knowledge base.